Recently, DSD’s Nicole Ronchetti was featured in the Acumatica Cloud ERP Developer blogto share how users can work with the Acumatica Mobile Framework.
Ronchetti explains how the AcumaticaMobile Frameworkis an amazingly easy tool to work with. There is no need to learn how to program forIOSorAndroid.
By using theCustomization Project Editorwithin Acumatica, users can customize the mobile interface with very little code. Ronchetti shows how to modify the display of certain fields in aGeneric Inquiryon the Mobile app.
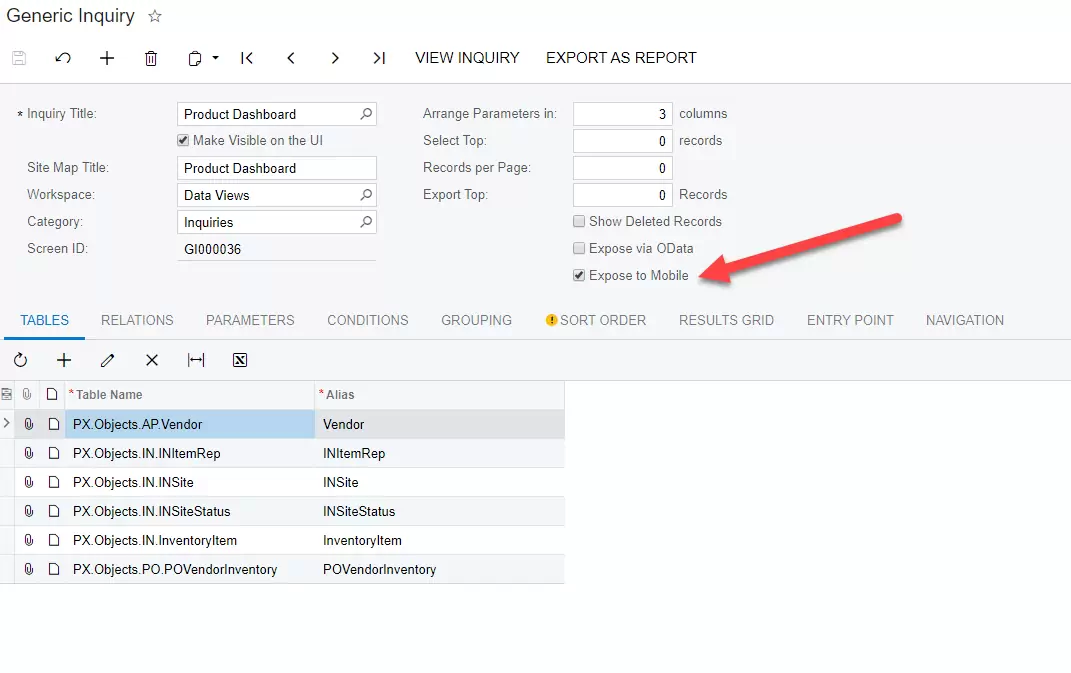
Users can easily add generic inquiries to the mobile app in Acumatica by simply clicking on theExpose to Mobilecheck box when creating the GI
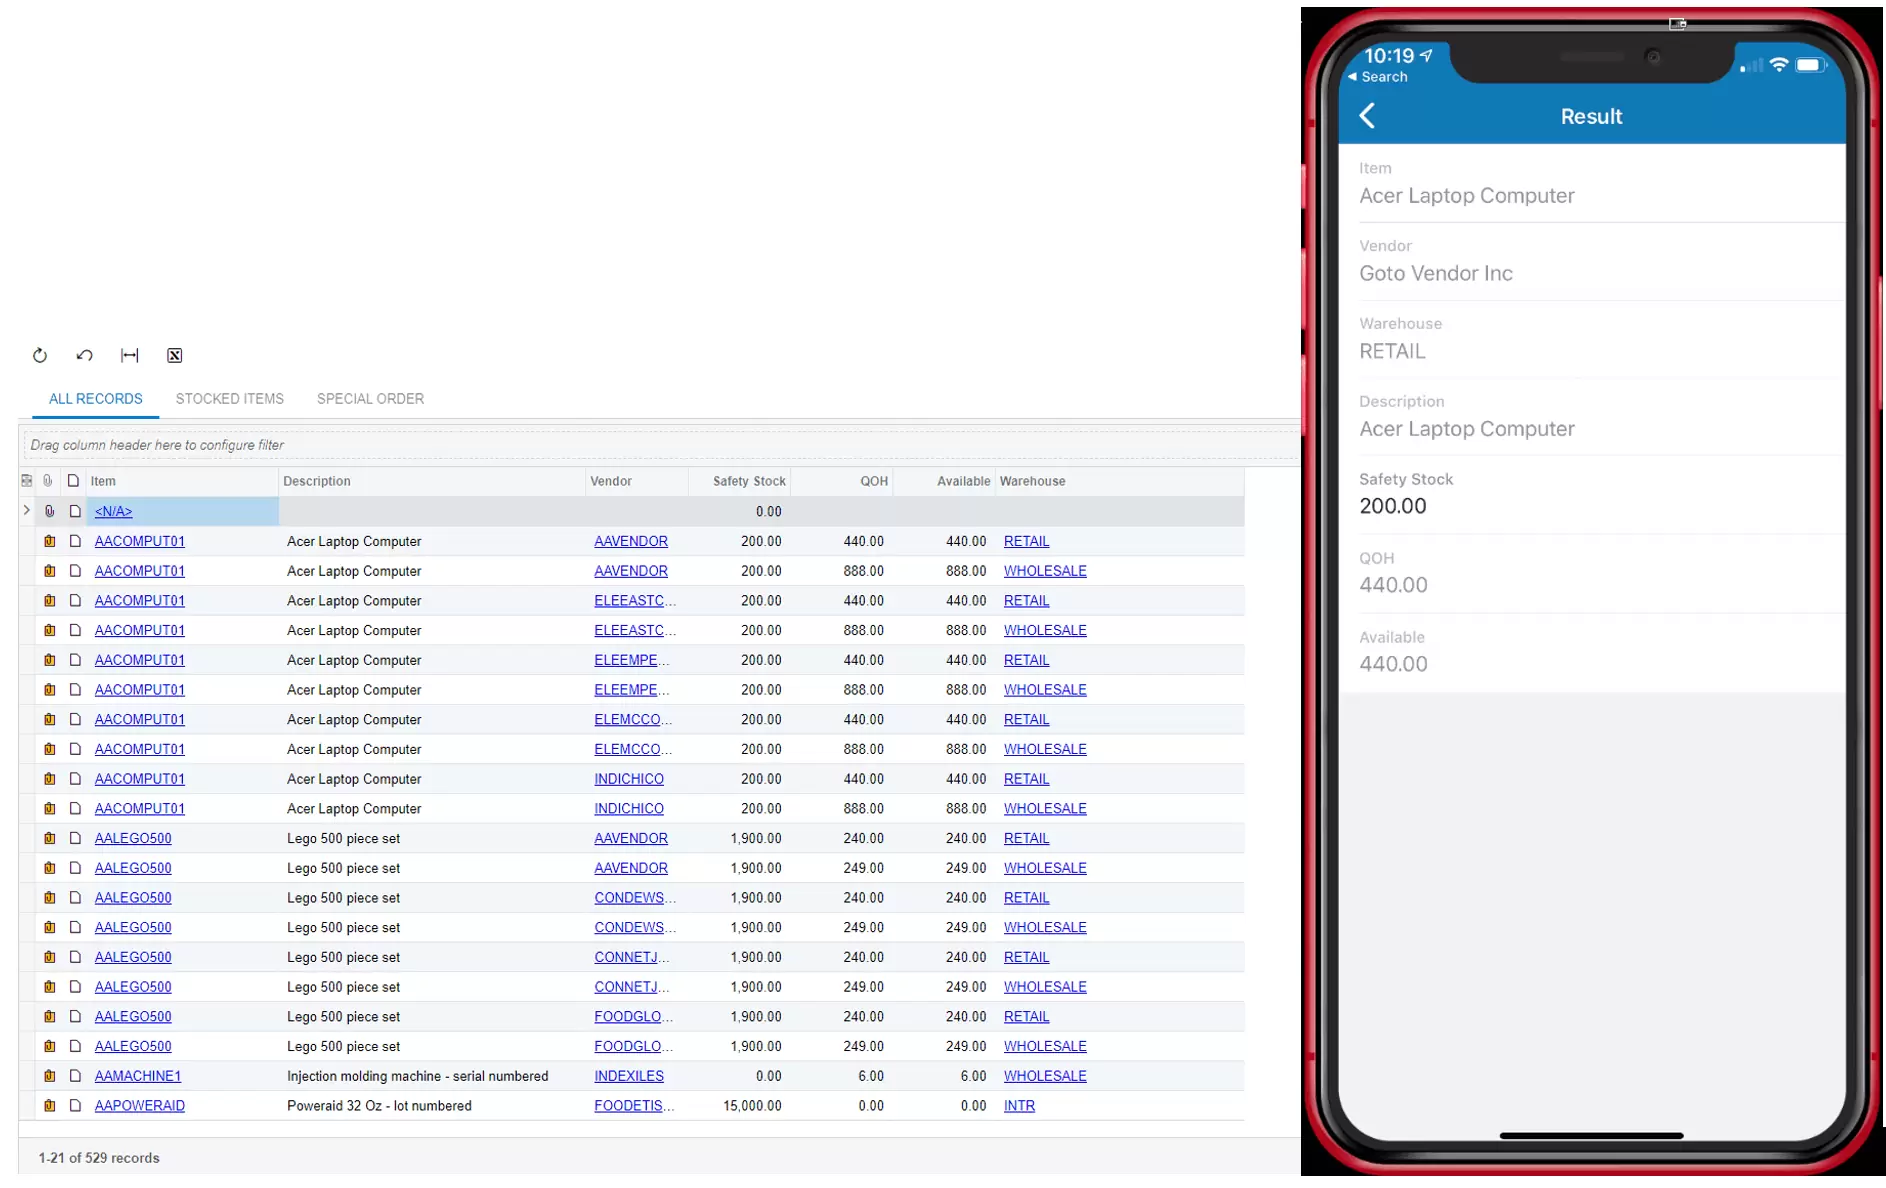
However, when comparing this screen on the desktop with what we see on the mobile app, some issues appear.
First, the mobile app will automatically render the Itemand Vendor with the descriptions instead of the code (CD). Ronchetti explains how the Item Description field is visible twice. In addition to that, the Safety Stock field, which is a calculated field in the GI, appears to be editable.
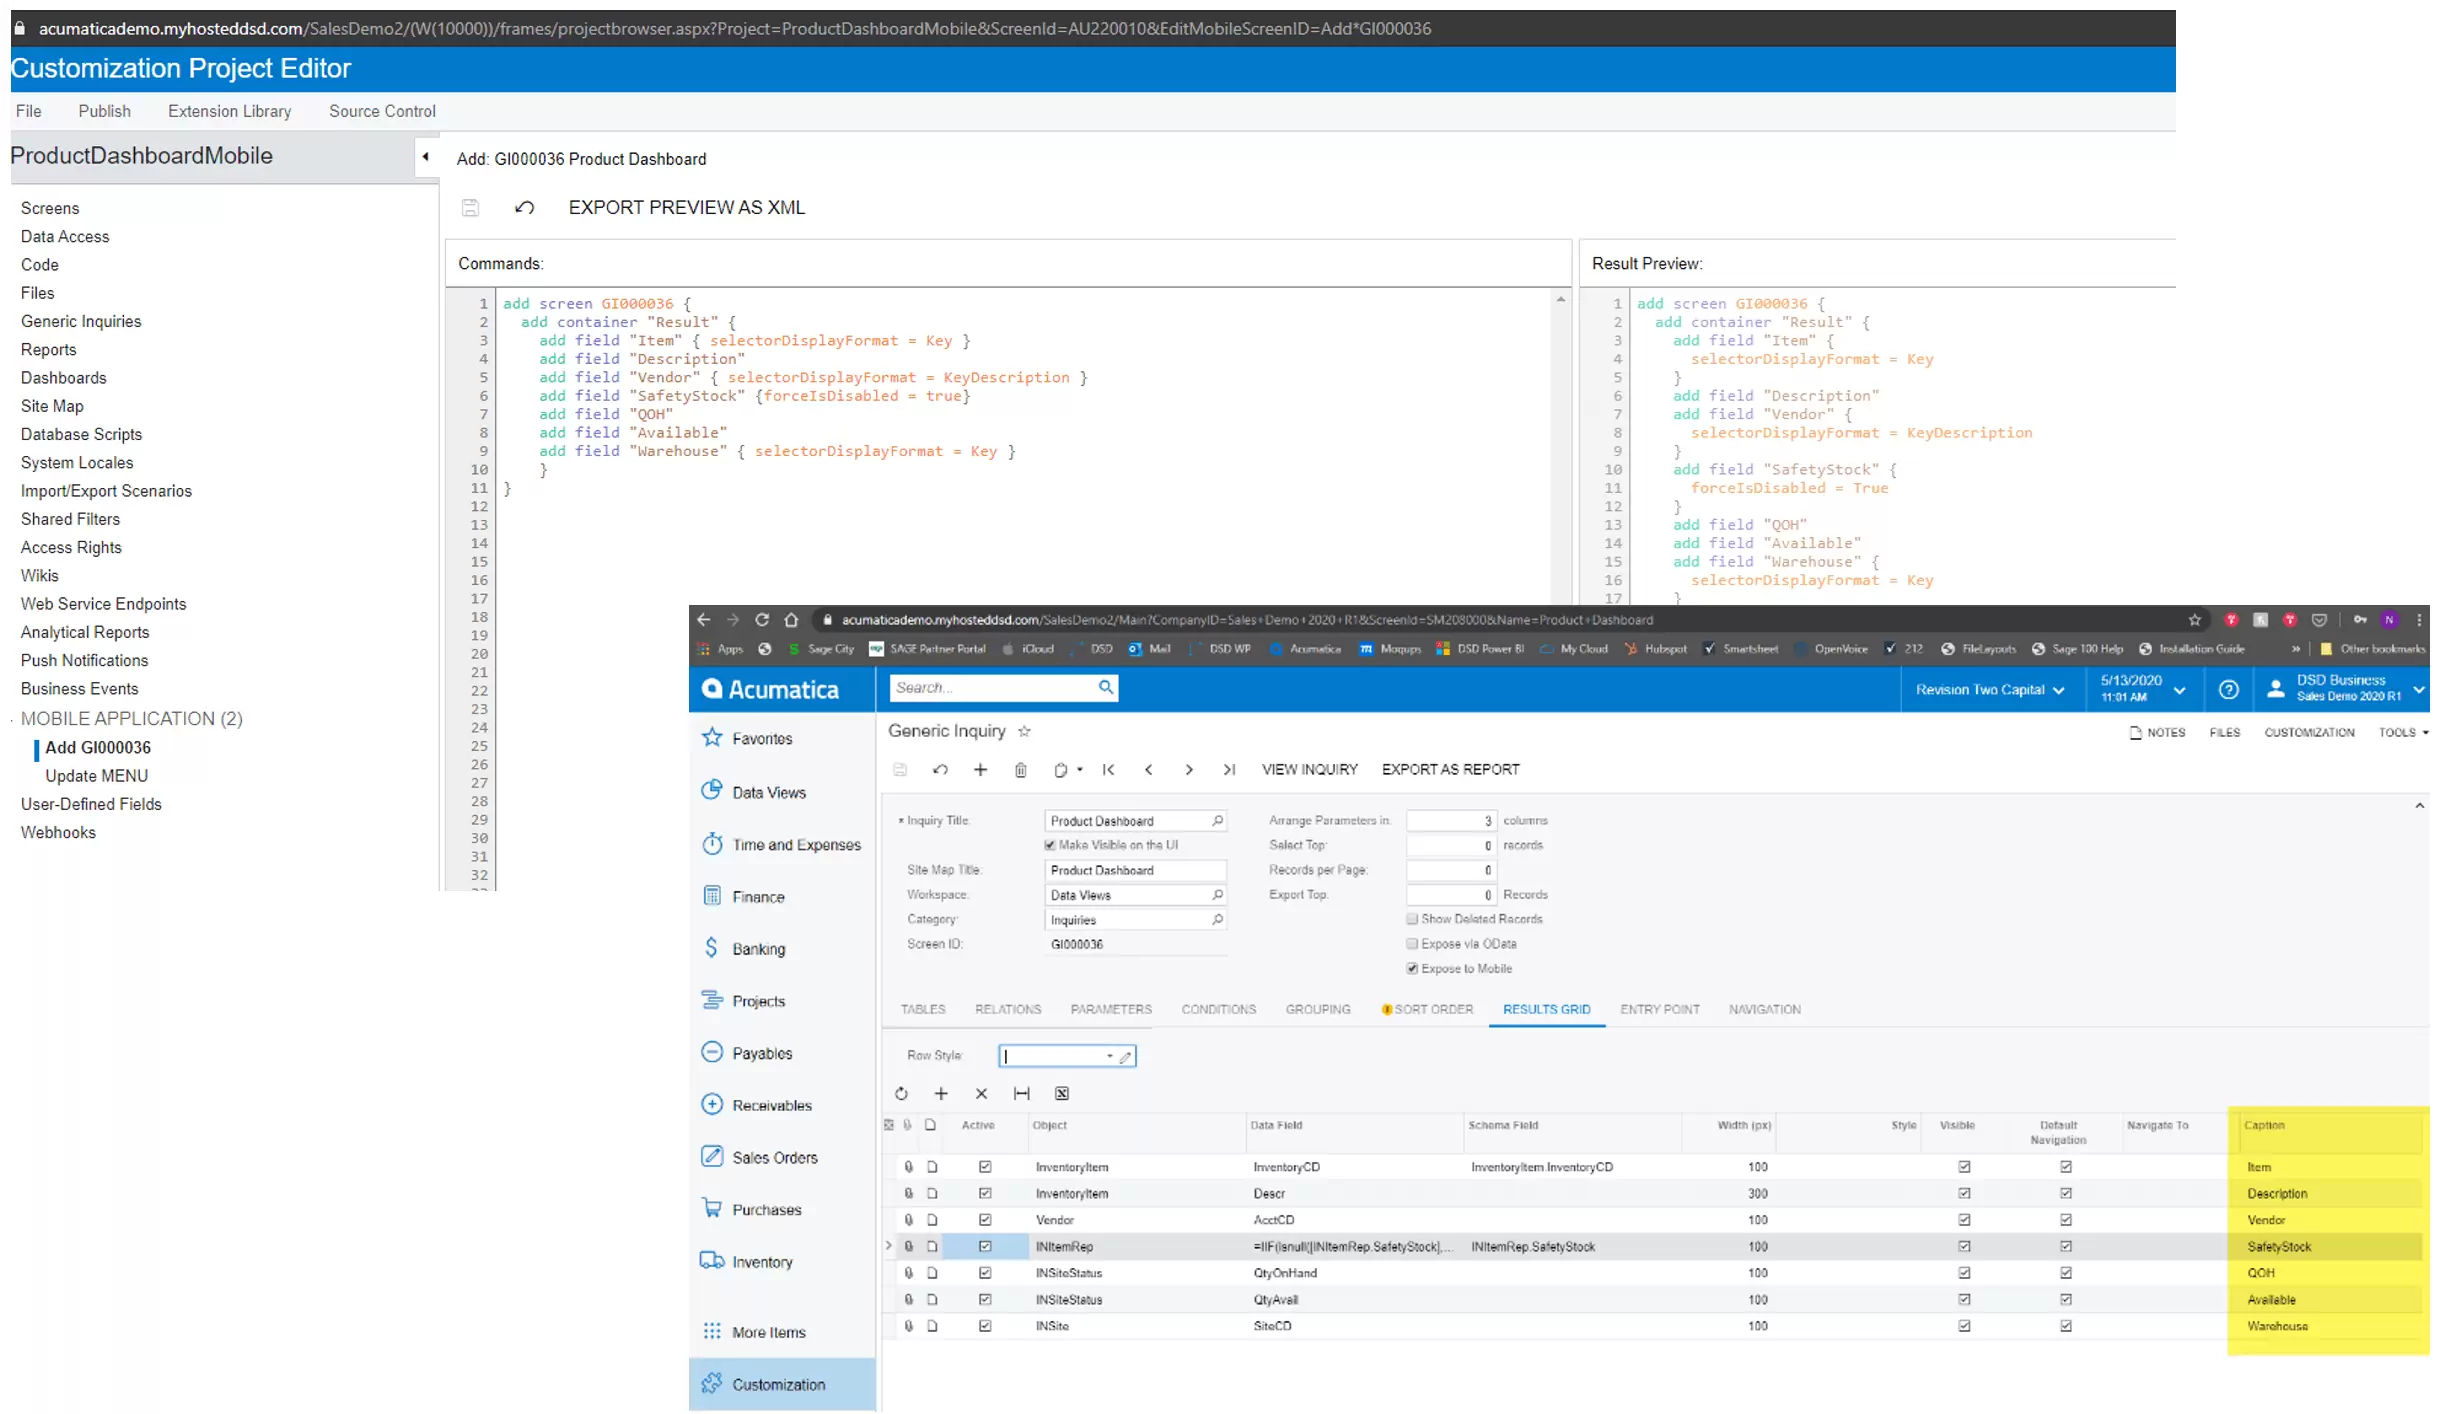
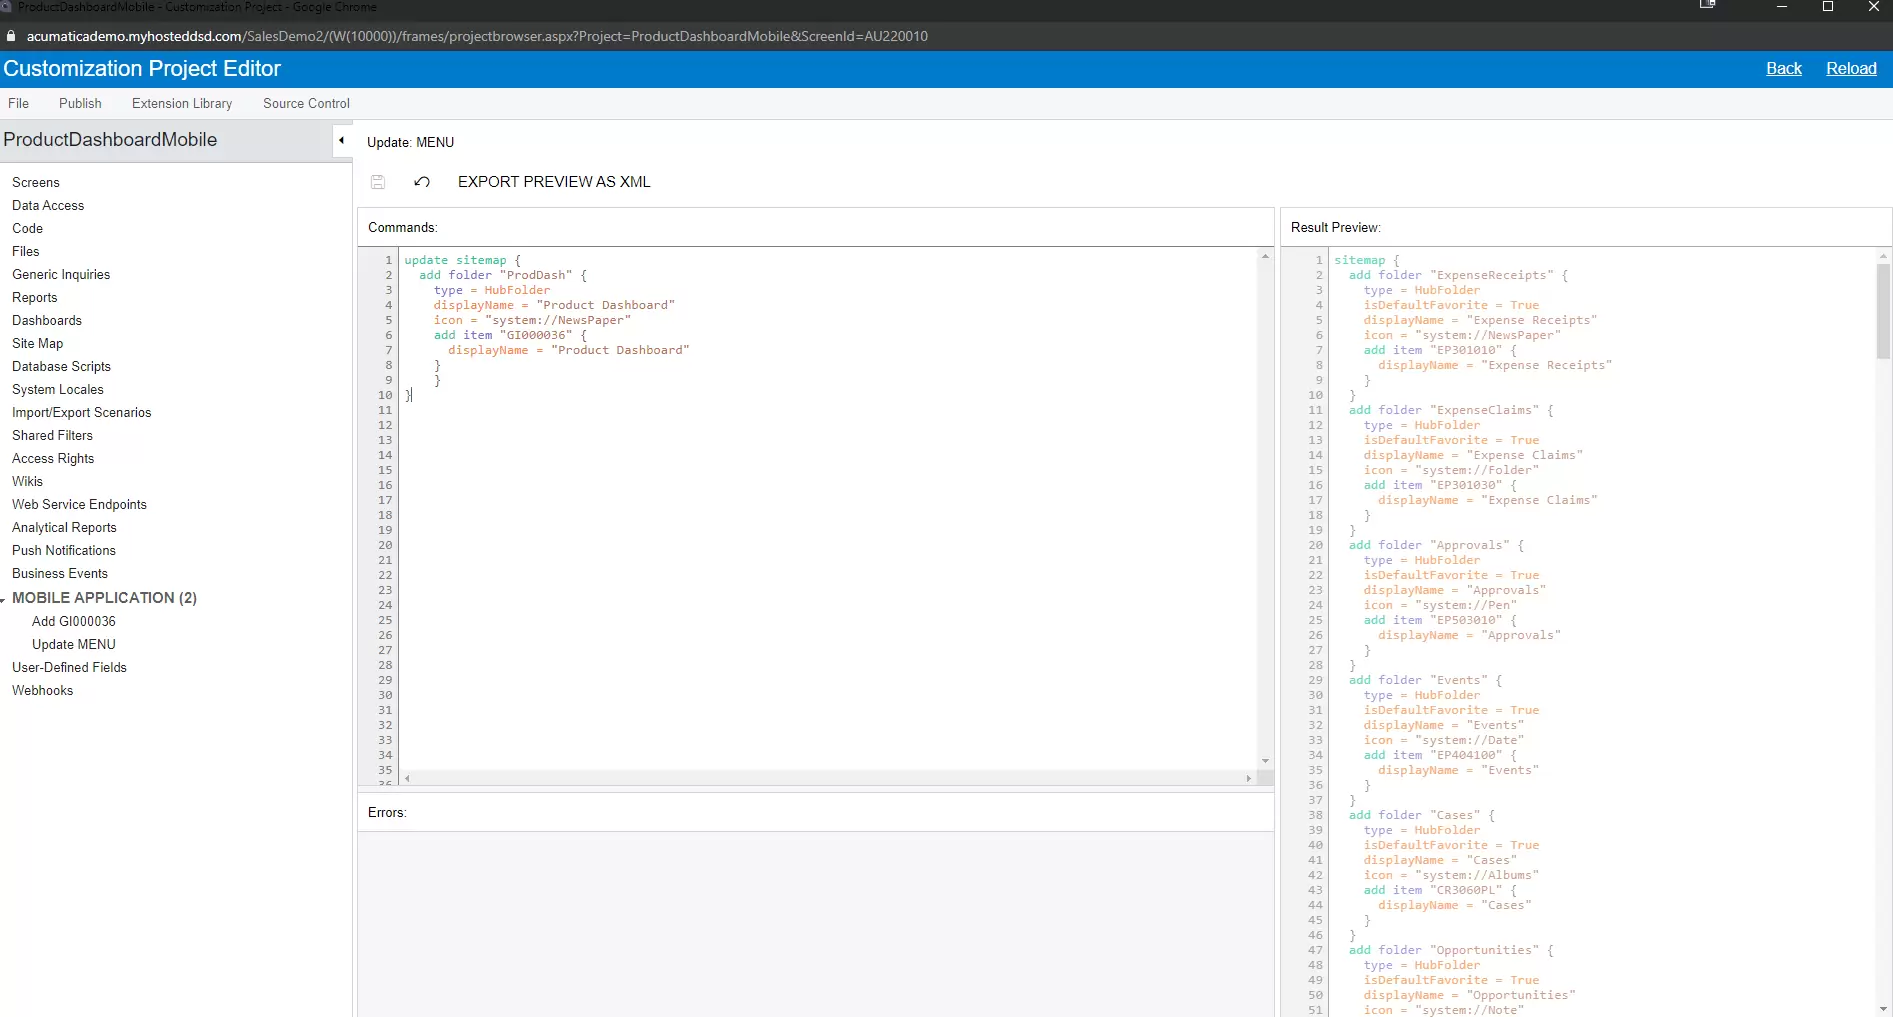
To correct these display issues, create acustomization projectto add a new screen to display the generic inquiry on our Mobile Application.
First, create a customization project. In theCustomization Project Editorin Acumatica, underMobile ApplicationselectCustomize > Add New Screen. In the dialog box that appears, select theScreen IDwhich corresponds to the Generic Inquiry you wish to display.
UnderCommands, add the containerandfieldsas seen below. These field names will correspond to thecaptionof the column in the generic inquiry.
Ronchetti sets theselectorDisplayFormaton the Item and Warehouse tokeyto display thekey value(our code) instead of thedescription. She also sets theVendorto displayKeyDescriptionwhich will provide a combination of bothKey and Description. TheforceIsDisabled is also set for theSafety Stockfield to true so that field will be disabled.
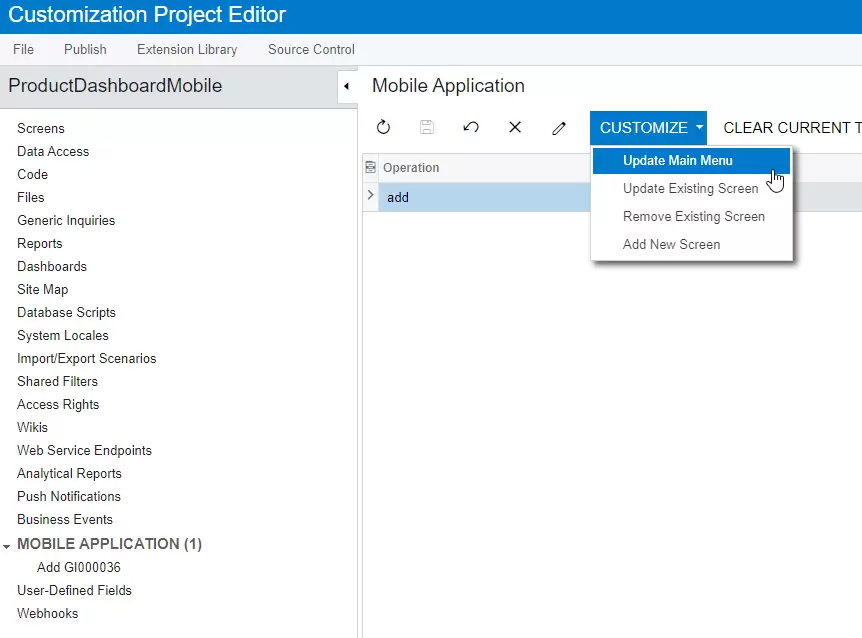
Next we need to update the menu in the mobile app. Under Mobile Application in the Customization Project Editor selectCustomize > Update Main Menu.
Next we will add some simple code to add this item to the menu.
When done, hit save and publish the project.
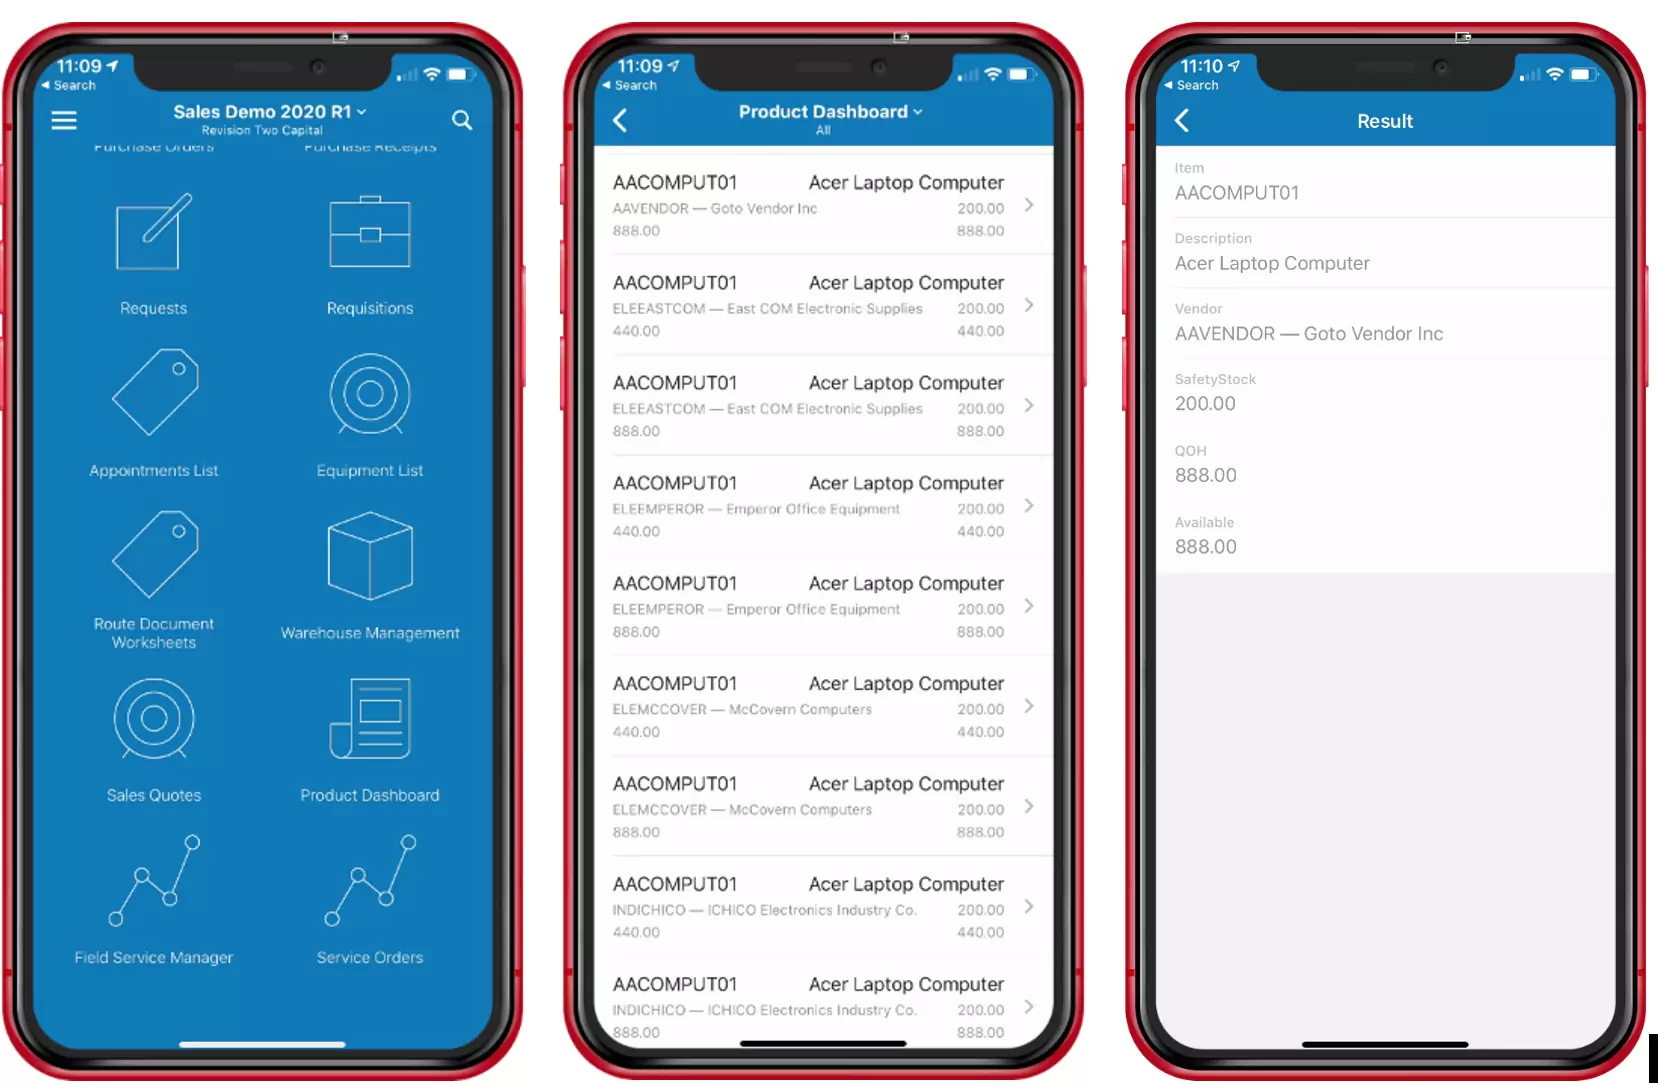
Now, when we look at our Mobile application, we will see all of our changes.
The Product Dashboard icon now appears on our main menu with the new icon. When viewing our list, we can now see the inventory codes displayed and well as our other changes to the various fields.
Hopefully, this provides you a good introduction as to how easy it is to customize Acumatica’s Mobile interface. Using the Customization Project Editor, we are able to modify the mobile interface without any programming for IOS or Android.
To learn more on how to customize the Acumatica mobile interface, check out the Acumatica University courses T400 and T410: