The Invoice Payment Selection is a great tool to use for invoices due, payment amounts and to print multiple checks. A common practice I see is many businesses send payments on a regular basis, such as once a week or every other Friday. The payment selection is helpful for the CFO or other accounting staff to see a picture of upcoming payments due in a specific time period. I will outline the basic steps to creating a payment selection and printing checks.
Creating a Payment Selection
Select the Accounts Payable Module
Click on Check Printing
Click on Invoice Payment Selection
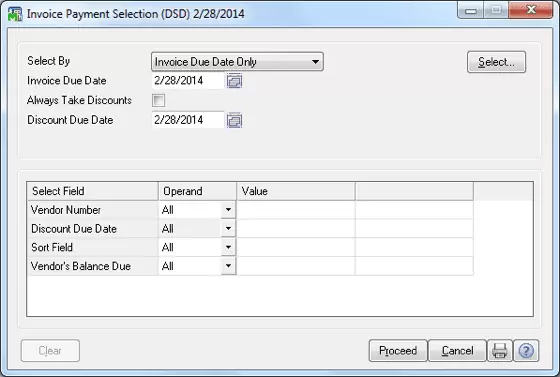
In this example, I am selecting by Invoice Due Date Only. There is also the option to select by Discount Due Date Only or Invoice and Discount Due Dates.
Enter an invoice due date – this will select all of the invoices that are open for payment up to this date
Click Proceed
Click the printer button to print the Invoice Payment Selection Listing
Click No when asked to print checks
Review the payment selection
Selecting Invoices to Pay from the Payment Selection Listing
To add or remove invoices, follow these steps. If there are no changes to make, proceed to the next section, Printing Checks.
Select the Accounts Payable Module
Click on Check Printing
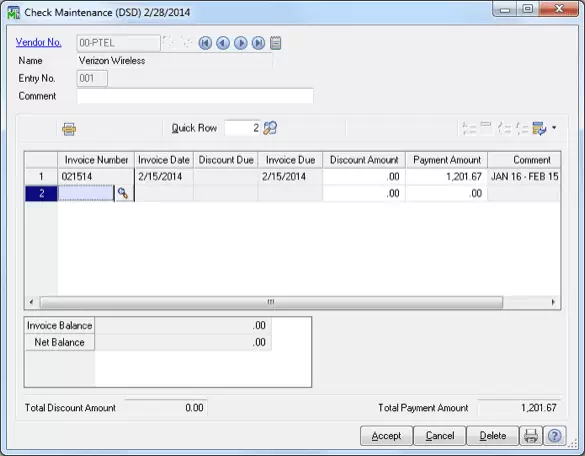
Click Check Maintenance
Enter the vendor number / Entry Number
All of your open invoices will be listed in this window from the vender you entered. You can delete invoices by lines depending on which invoices you want to pay. If you do not wish to pay any invoices that are listed in this window, click on the Delete button on the bottom right of the window between the Cancel and Printer button. This vendor now has been deleted from your Payment Selection.
Printing Checks from Your Payment Selection
You are now ready to print your checks from the Payment Selection Listing
Select the Accounts Payable Module
Click on Check Printing
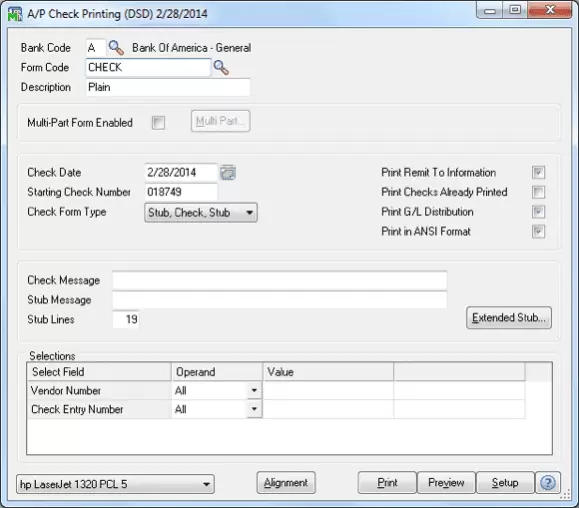
Select the appropriate Bank Code by clicking on the magnifying glass
Make sure your both your check date and your starting check number matches
Choose the correct check form type
Print
After your checks have been printed, Sage 100 ERP will prompt you to print the Check Register, which breaks down each vendor you paid and the check number they were paid with.